Are you planning to print banner but you don’t know how to make the design with software like Photoshop and Illustrator? Is PowerPoint the only software you can use and possibly design banners? If the answer is “yes”, this blog post will teach you step by step to design the banner by PowerPoint.
Step 1 : Open PowerPoint
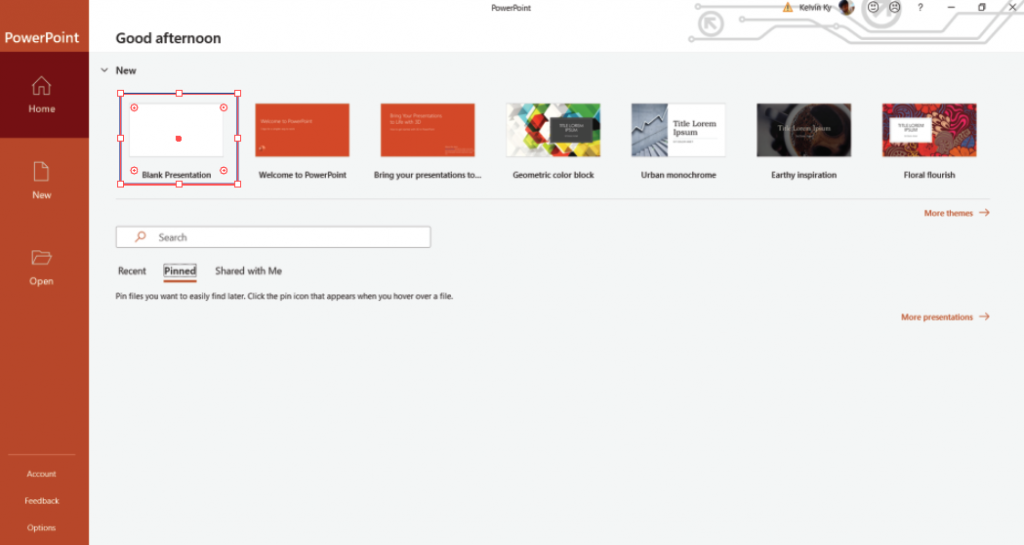
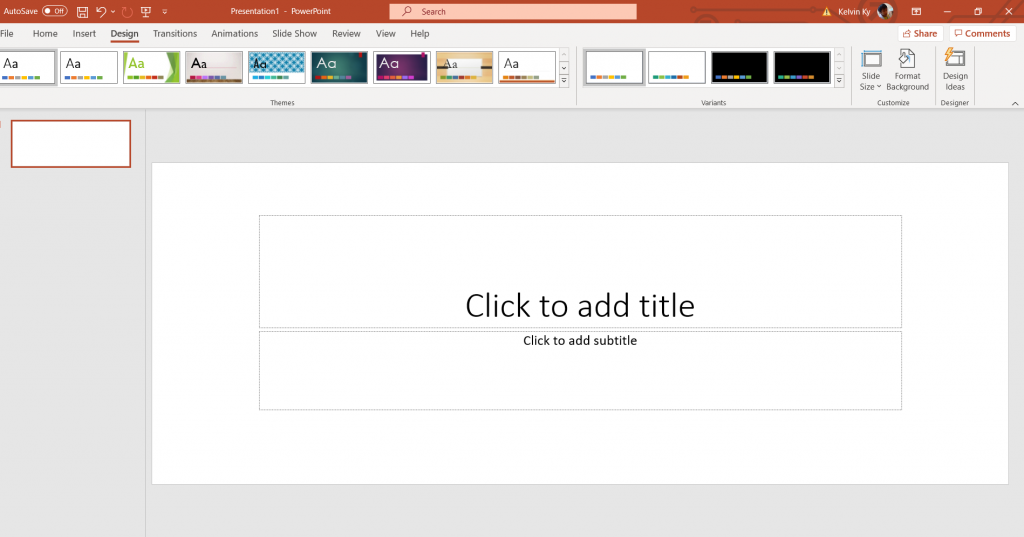
Click the “Blank Presentation” button and then the system will direct you to the PowerPoints’ workspace (artboard) which shown in diagram below
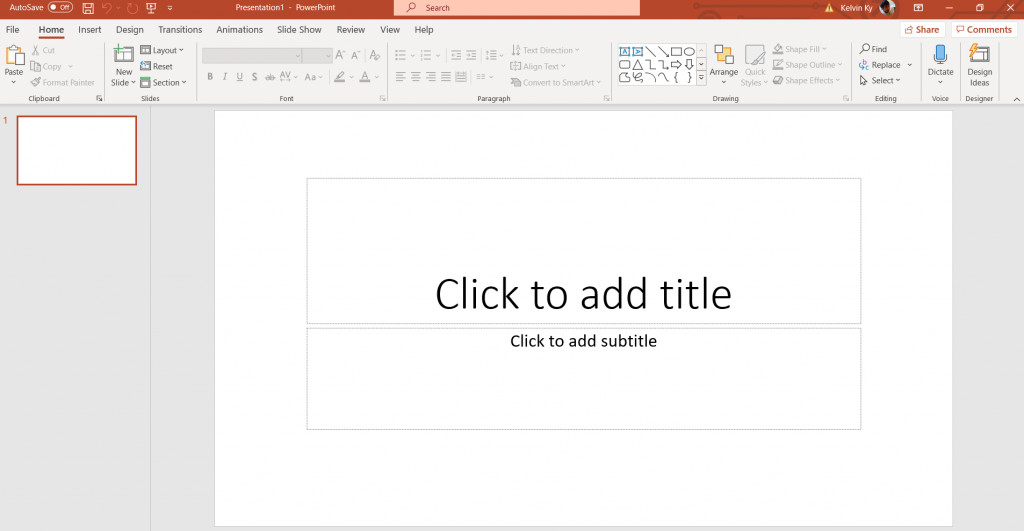
Step 2 : Change The Artboard’s Size
The original size of PowerPoint’s workspace is 13.33 inches by 7.5 inches. In most cases, it should not be the size of the banner. Therefore, you need to change the size of the workspace before you start to design the banner.
Unfortunately, the maximum size of PowerPoint is 142.24cm. Therefore, you cannot change the new size by according to your banner’s actual size. You can only follow the ratio of the original banner size. For example, if your banner is 96 inches x 36inches, the size of the PowerPoint can be 96cm x 36cm.
Follow these steps to change the size:
- Click the “Design” button and
- Then find the “Slide Size”
- lastly click the “Custom Size” button

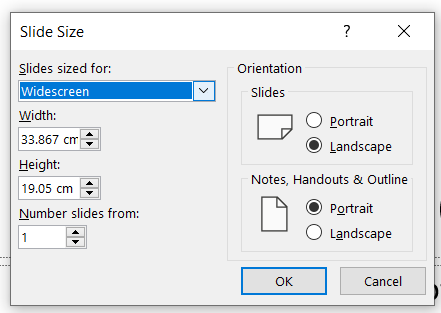
After that, you will see a box is displayed on your screen. You can key in your banner size and then click the “OK” button
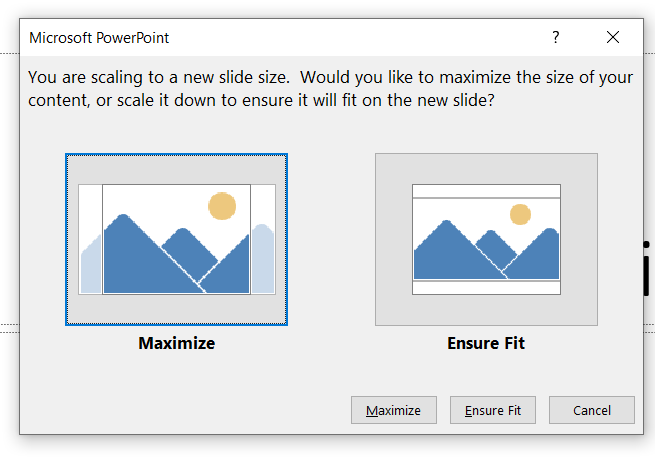
Once the system detected you are changing the workspace’s size, it will prompt a notification to you. You need to click the “Maximize” button
After you click the “Maximize” button, a new work space will be displayed. The picture below shown the example of 96cm x36cm workspace
Step 3 : Start To Design A Banner In PowerPoint
You can now start to design banner by your creativity. Furthermore, we want to provide some tips to help you make the banner design better. Here are 3 tips that you may need :
Tips 1. How To Change Background Color
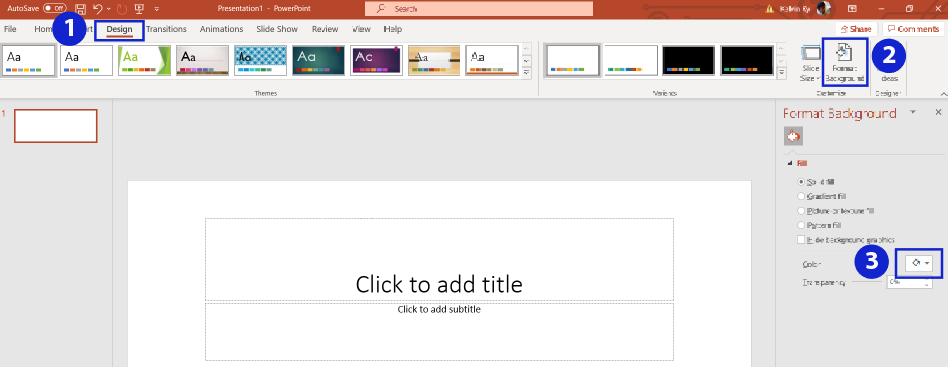
Here are the steps to change background color :
- Click “Design” button
- Find and Click “Format Background”
- Click the “Fill Color” Icon
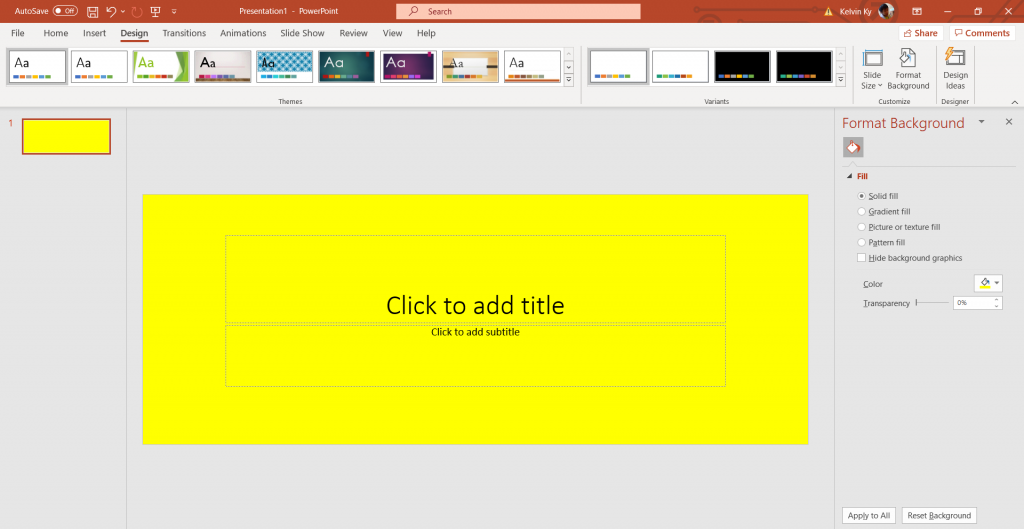
The picture below shown the background has changed
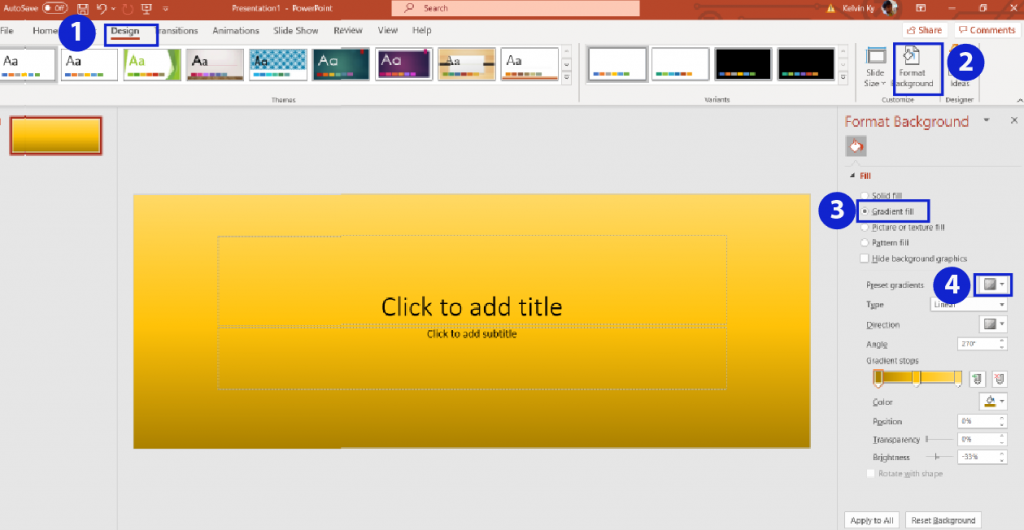
If you don’t like solid color, you can also change it to gradient color. The picture below shown you how to make the banner background become gradient color
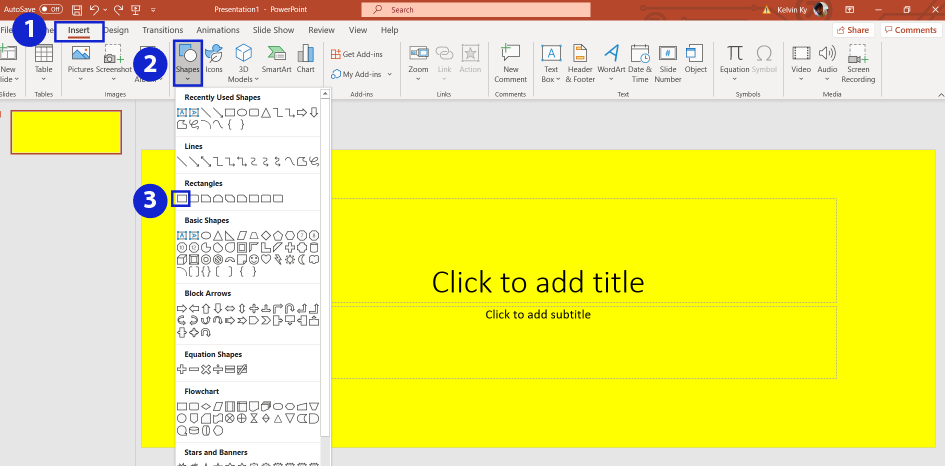
If you need more than 1 background color, you can achieve it by using “shape” . Here are the steps to create “shape”
- Click “Insert” button
- Find and Click “Shapes” button
- Select “rectangle” shape
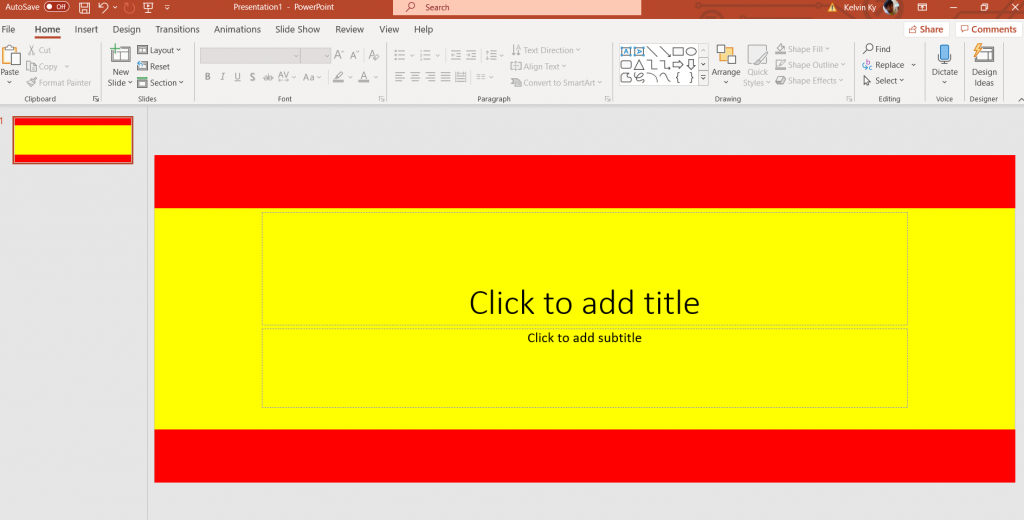
The picture below shown the result of second background by using “shape”
Tips 2 . How To Get Free & Nice Image and Icon
Here are the websites who provide image and icon
- Freepik.com (Image)
- Flaticon (Icon)
- Shutterstock (Image / Icon)
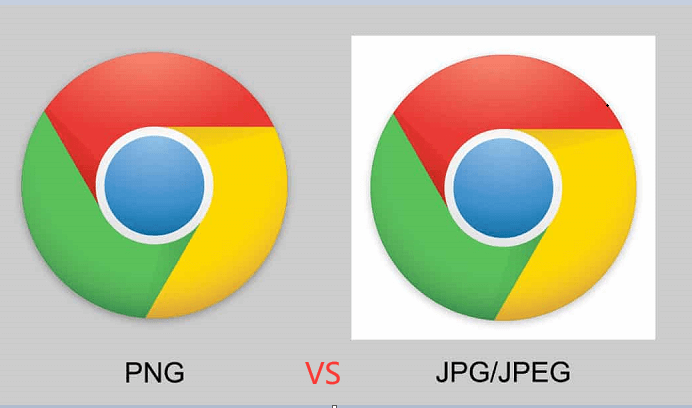
We recommend you to find “PNG” image but not “JPG” image because most of the jpg image will have a white background. PNG is recommended because PNG image has a transparent background.
The image below shown the difference between png and jpg image
Step 4 : Save As PDF
You need to save the banner design as PDF before you send to banner printshop. If you want to print your banner online, you can click this link to check our price.